
Kubernetes and Visual Studio Code, an ideal combination
In a recent project, we use Kubernetes to host our workloads. The cluster and agents are running in Azure and we used to have this set up as virtual machines provisioned by infrastructure as code. When we wanted to do some work on the cluster, we just opened an SSH tunnel like this:
ssh -i ./.ssh/id_rsa_k8sd -l azureuser -L 8001:localhost:8001 clustername.westeurope.cloudapp.azure.com
This gave us a direct link to the master and we could use for example the kUbernetes dashboard by browsing to http://localhost:8001/ui
All good and well, but managing a Kubernetes cluster is not what we wanted to do, so when the Azure Kubernetes Service was released, we switched over to the Azure PaaS variant of Kubernetes.
Although it has some quirks, it also has some advantages. One of those is the AZ CLI. Using simple commands you can create a new managed cluster, connect to it and operate it.
For example, creating a cluster is a simple as issuing the following:
az group create -l westus -n myResourceGroup
az aks create --resource-group myResourceGroup --name myAKSCluster
When the cluster is running, you need to have the kubectl tool installed. If not already done so, you can use the same AZ CLI to install it:
az aks install-cli
And then connect to the cluster using:
az aks browse --resource-group myResourceGroup --name myAKSCluster
This will basically do the same as the SSH method; it opens a tunnel and starts your local browser so you can access the web interface.
However, here is where the AKS implementation is a bit problematic. The connection drops constantly. It will be shown in the console output, but only after a while and since the dashboard performs a lot of hidden HTTP calls, it is hard to see if it is still working or waiting.
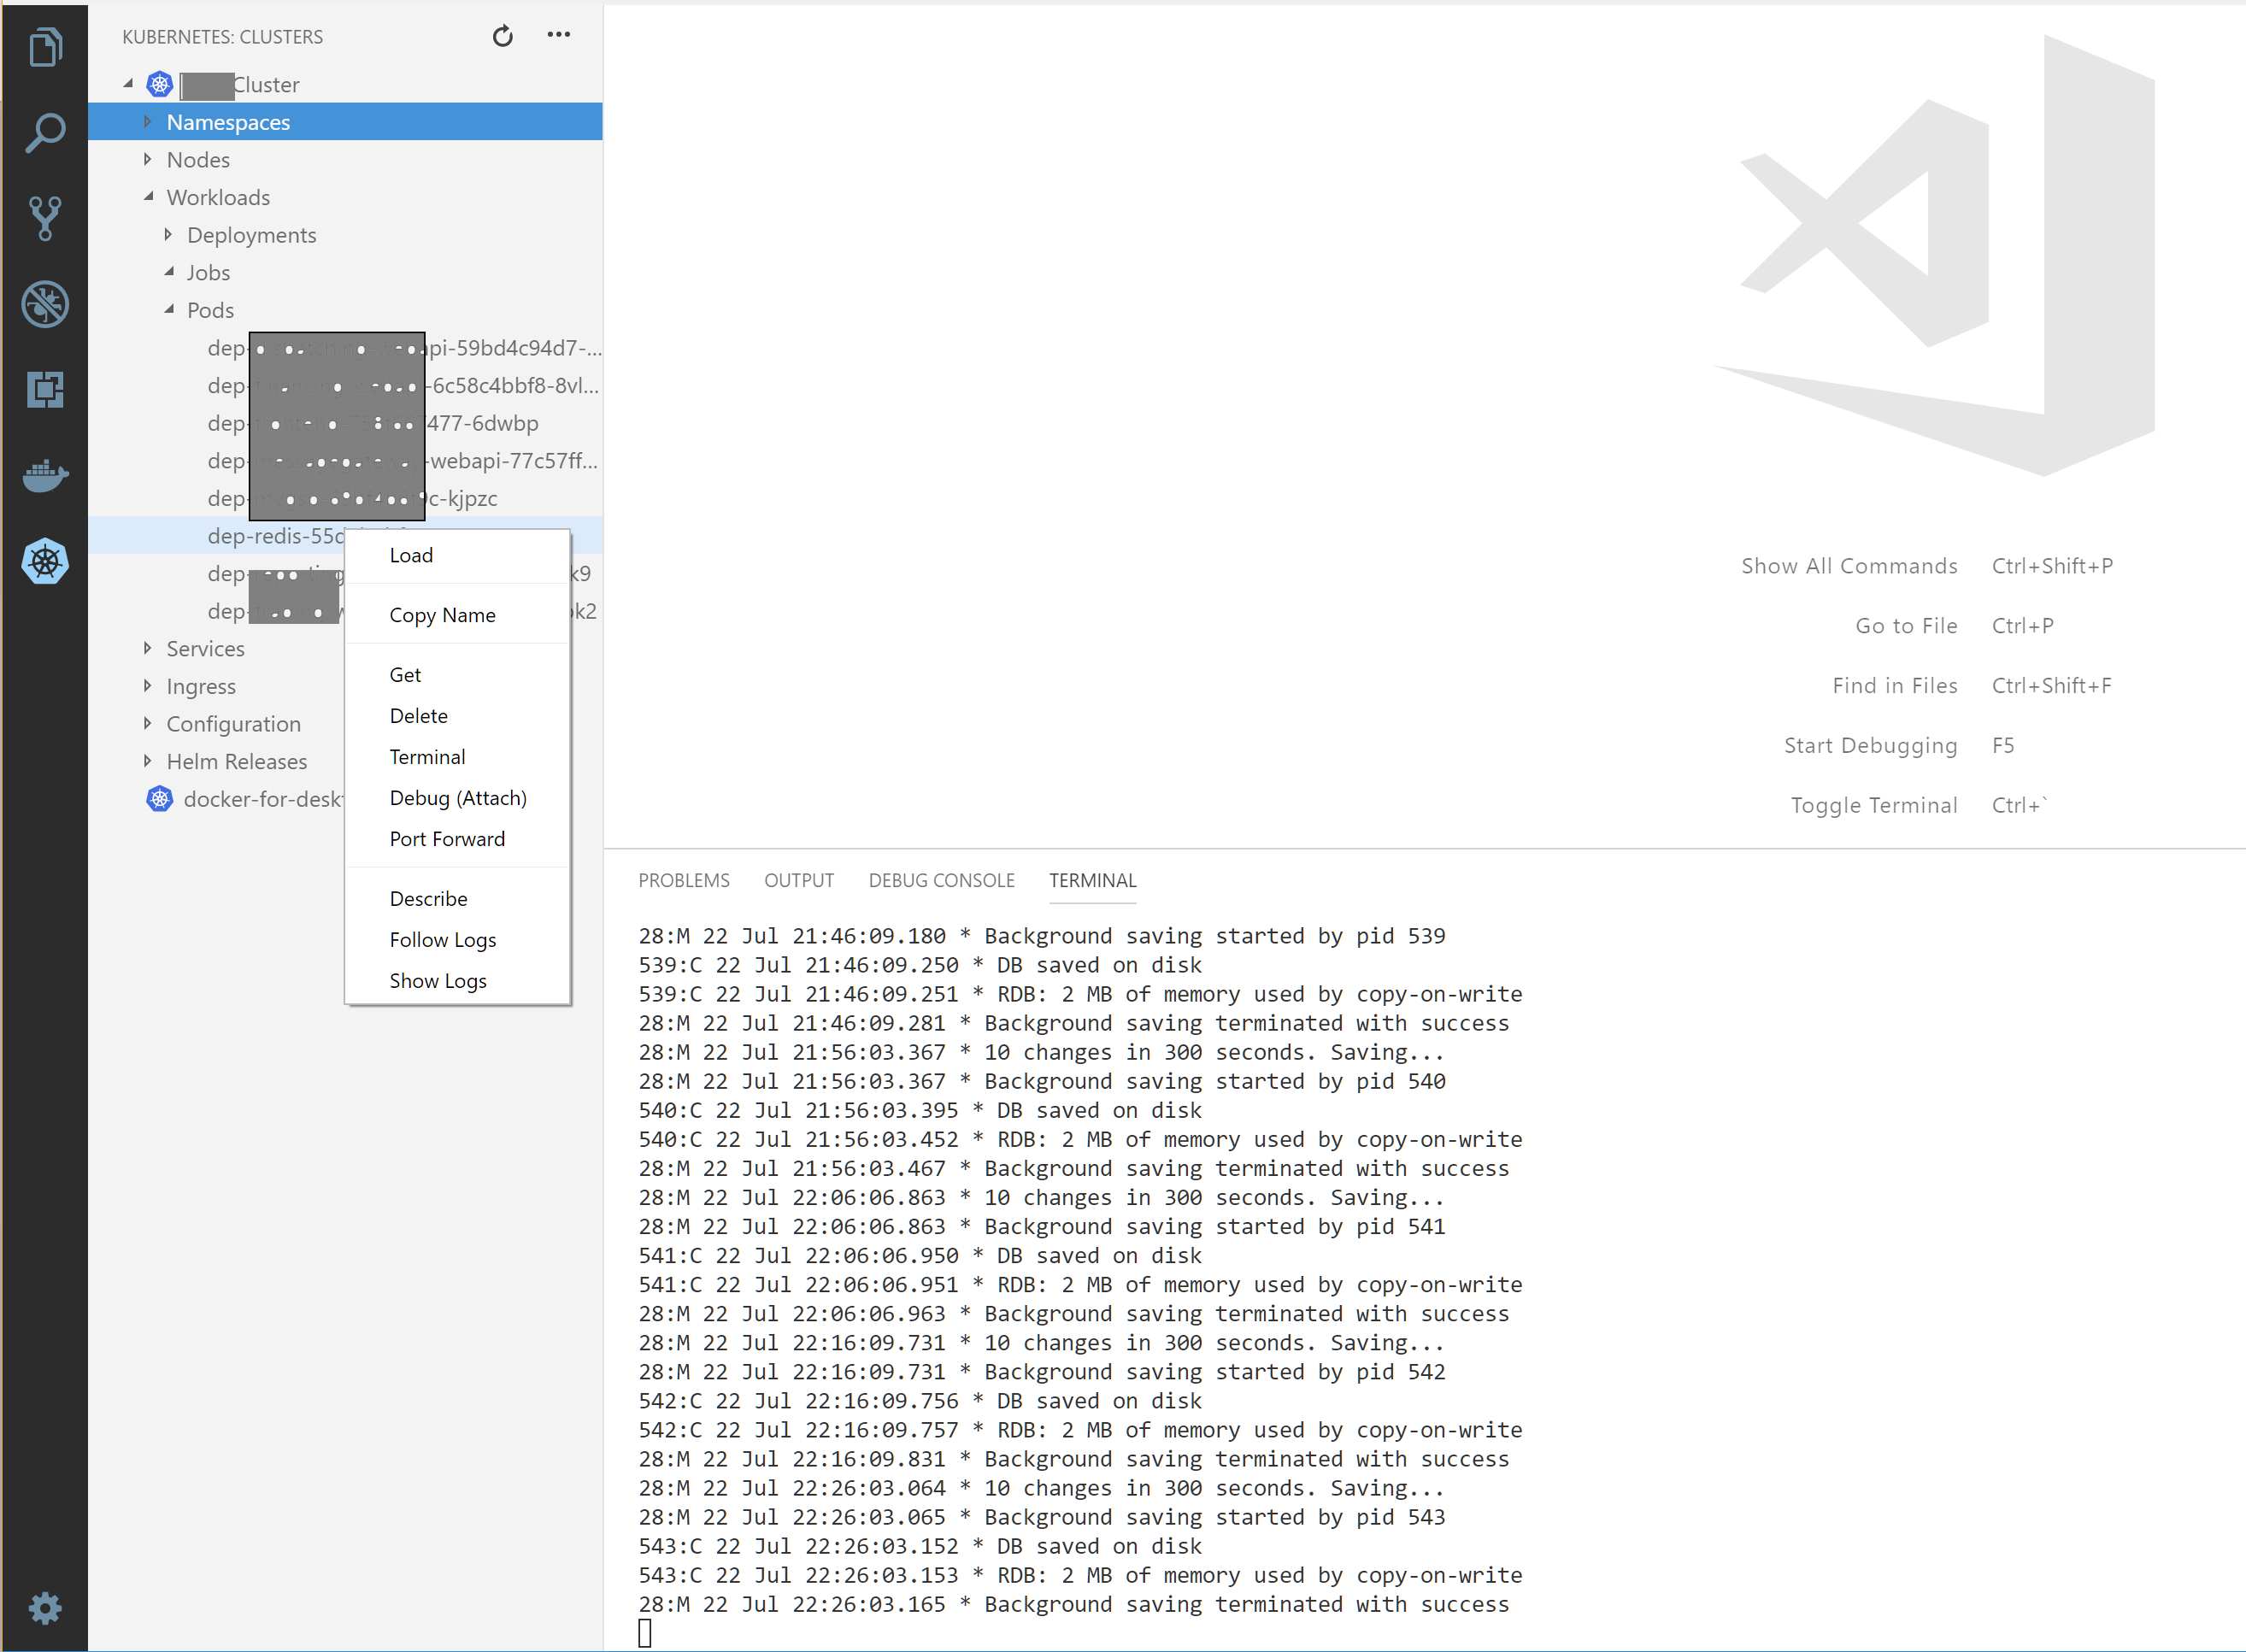
Luckily there is a nice solution in the form of Visual Studio Code and an extension called ms-kubernetes-tools. After installing this extension, you will see an additional icon inside the VS code environment.

When clicked it shows all registered clusters with a lot of details and offers you some handy features:
- List all available namespaces.
- An overview of the nodes and which pods are running on those.
- List all running pods in the selected namespace.
- Get the running log of a pod.
- Delete a pod.
- Port forwarding to the pod.
The ability to see the output of a pod is ideal. It allows for quick problem solving by just inspecting the contents of the log. It even allows you to have a running log by tailing the output.
We also have some isolated environments where we use a SQL server inside the cluster. This server is accessible by the other pods, but not exposed outside the cluster. When we want to connect to this server, we can do a simple port forwarding to the pod and expose port 1433 so we can use the SQL Management Studio to execute commands.
Note: use 127.0.0.1,portnumber instead of 127.0.0.1:portnumber when entering the address in SQL Management Studio.
All these simple commands are actually kubectl combinations which are executed in the default console of Visual Studio Code by the extension. This works much faster than the web interface and the connection is pretty stable.


Leave a comment