
Run the Azure CLI 2.0 on a VSTS hosted Linux agent
The new Azure CLI version 2 is pretty easy to use when you want to manage your Azure resources. Even if you want to use it from the VSTS build/release agent, you can use the special Azure CLI task. This will log in, set the correct subscription, execute inline or script and perform a logout.
The task is clever enough to detect the type of operating system and will switch between using a shell or a batch file. An inline script will be saved as a temporary shell or batch file too.
The agent that executes the task need to have the Azure CLI installed. On your own agents, this is a once off operation. When you use the hosted agents, you can also use the Hosted VS2017. When the Azure CLI is not there, you can, of course, install it with a task.
Linux agent
So when you want to use a Hosted Linux agent, then at this time of writing, it does not contain the Azure CLI. Luckily it is pretty easy to add.
At the beginning of your process, add a Shell script task. You can use the Microsoft version however that requires you to put the script in source control. Alternatively, you can use a Shell script that supports inline script.
You can find the script here but as it is pretty short I have included it below.
#!/bin/bash
echo "deb [arch#amd64] https://packages.microsoft.com/repos/azure-cli/ wheezy main" | \
     sudo tee /etc/apt/sources.list.d/azure-cli.list
sudo apt-key adv --keyserver packages.microsoft.com --recv-keys 417A0893
sudo apt-get install apt-transport-https
sudo apt-get update && sudo apt-get install azure-cli
After your shell script task, add your Azure CLI tasks. You will get something like the below.
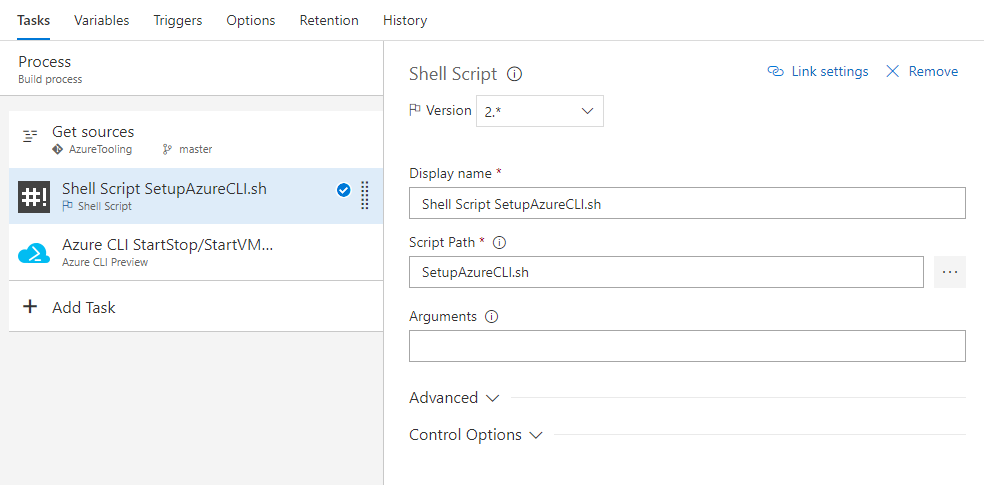
Hopefully, Microsoft will add the Azure CLI to their images, so this step will not be needed anymore.


Leave a comment