Save money in Azure by shutting down VMs
In Azure, you pay for what you use. And when we talk about virtual machines, this means that you pay for the compute, network and storage. This is charged by the minute, so anytime you are not using the VM, you can save money by turning it off. You need to be careful though as turning it off from within the VM moves it to a stop state but still incur a cost. You need to make sure to deallocate the resources. Only in this state, you will not be charged.
So how to actually make sure the VM is deallocated? The easiest way is to use the Azure Portal. Go to the virtual machine and select the Stop option. In the overview section you will see a Stopped (deallocated) appear which means that the VM has no cores assigned to it anymore and you will no longer be billed for it.
Automation
Doing it manually is nice, but using automation is better. There are various ways to talk to the Azure APIs, but the Azure CLI is pretty simple to use. Make sure you install it using the documentation first.
With the following command you can deallocate the VM called ubuntu in the resource group vm-auto-rg:
az vm deallocate --name ubuntu --resource-group vm-auto-rg
Starting the same machine is easy too:
az vm start --name ubuntu --resource-group vm-auto-rg
Instead of name and resource group, you can also use the –ids option to pass in the identifier of the machine. Another useful option is to add the –no-wait option which indeed does not wait for the response to be returned.
Be aware; you can also do a stop with AZ command, but this will mean the machine is still billable.
Auto shutdown
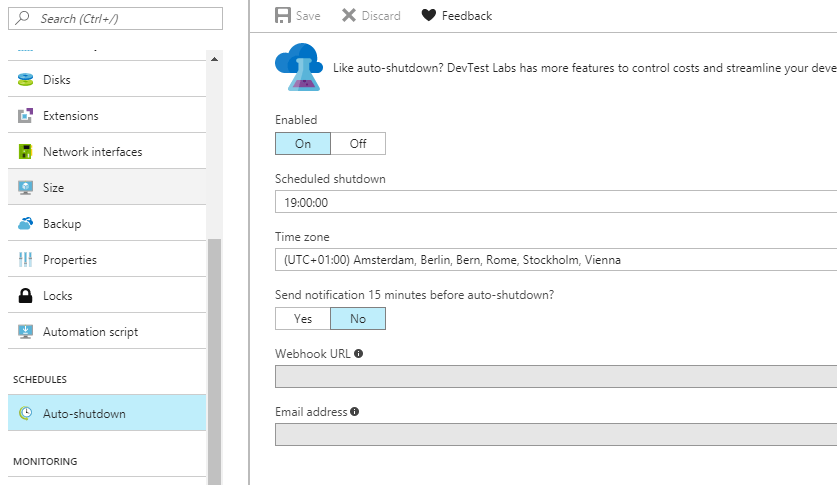
The above command you need to run manually, but luckily there are options in the Azure portal to help you. Inside the VM blade, there is an Auto-shutdown section where you indicate a schedule to automatically shutdown (meaning deallocate) your VM.

However, this does not include an option to start the VM automatically. Do consider if this is really needed, a manual start can be a better approach. This option can make sure you do not forget to turn off the machine at the end of the day.
More control you get when you use the Azure DevTest labs. With policies, you can specify start and shutdown rules for the Virtual Machines inside the lab.
Runbooks
Using Azure Automation you can also setup runbooks that can do similar things. A more complicated version is this one and for a more simple version, you can implement this one. By applying tags to the machines you can specify more complex schedules.
Visual Studio Team Services
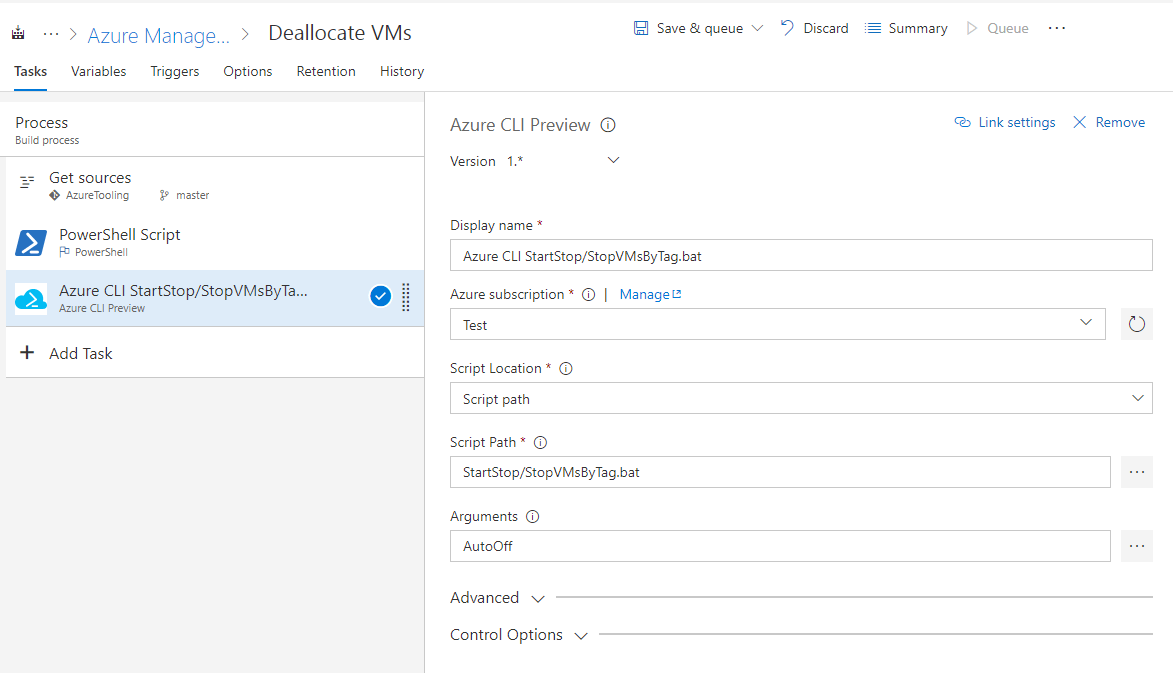
We see we can use the Azure CLI but need something to execute this command at a certain time. Azure Automation can do this, but we can also use VSTS as it has a build system with a scheduler. One of the tasks in VSTS is the Azure CLI task. Not only does it log in for you and set a subscription, it will also execute either inline script or a file from your source control.
That shell command is a one liner:
az vm deallocate --no-wait --ids $(az resource list --tag "$1" --query "[?type##'Microsoft.Compute/virtualMachines'].id" -o tsv)
It will find all machines of type VM and contain a specific tag. The resulting list will be used as the argument for the ids parameter to the AZ command. The $1 is used to capture the first parameter passed to the shell script.
We will use a Windows agent, so we need to make sure python and the AZ CLI are installed. Normally they are part of the hosted agents although at the time of writing this is not the case. No worries, we will just install it using a PowerShell command.
Update 01/Sep/2017 The issue is fixed and the hosted builds do have Python in the path and the tools installed. So the PowerShell step can be excluded.
So how to set this up
Create a new repository, drop the files from the StartStop folder in there and commit. This is not a hard requirement but having your scripts under source control is easier for maintaining them. However, you can also use inline scripts.
Next, create a new empty build, point to your repository and add a PowerShell task. We can use the inline script option and use the following as the scripts contents:
&'C:\Program Files\Python36\python.exe' -m pip install --user azure-cli
Write-host '##vso[task.prependpath]C:\Program Files\Python36'
Next, add the Azure CLI task. Select the StartVMsByTags.bat or StopVMsByTag.bat file. We are using a Windows host, so we need a batch file instead of a shell script, but both are included in the git repository. As the argument, enter the tag that you used to mark the VMs that should be turned off or on. With a scheduled trigger you set up a schedule so the build will be executed every morning, evening, weekend etc.

Create a similar build that does the reverse of what you just did; so run a build in the morning to start all the VMs in the subscription having the tag AutoStart and have a build in the evening to deallocate all the machines having the tag AutoShutdown.
You can play with different tags and schedules if that makes more sense. Do note that deallocating releases resources on the Virtual Machines, including IP addresses and when set to dynamic, you might not get the same IP back.
Conclusion
There are various ways to move VMs to a deallocated state and even options to turn it back on. Remember this will save you a lot of money (2431=744 compared to e.g. 85*4=160 hours). If you already have VSTS then it is a matter of using the Azure CLI task and some clever schedules and tags to get the same experience and start saving money.


Leave a comment